
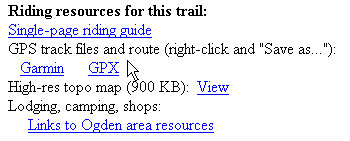
Download a track file from this web site, by going to the "Riding Resources" section at the
bottom of the trail's web page.Right-click over the file type you want. (If you try to download directly, your computer may
simply display the XML code of the GPS file inside a browser window. Or it may open it with
some other program that uses XML coding. So right-click. Right-click!
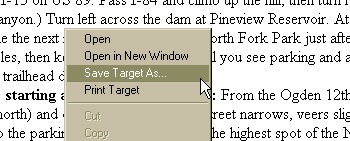
Did you remember you were supposed to right-click on the GPS file link?When the dialog box pops up, select the option that saves the file to your computer without
opening it.
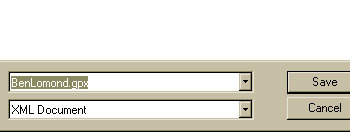
When the "Save" dialog box opens, browse to the directory where you keep your GPS track files.
Save the file.If you want, rename the file. Ignore any XML warnings or offers to convert -- a GPS track file
is written in XML language, and it's ready to use as-is.
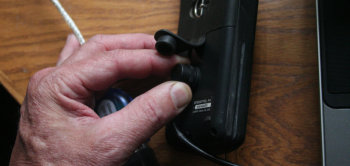
The file is now on your computer, where you can access it any time.Ready to transfer the ride data to your GPS unit?Plug your GPS unit into the computer transfer cable that came with it.
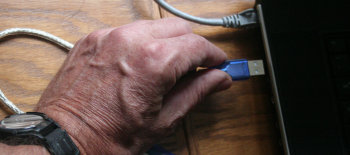
And plug the other end into the computer.Turn the GPS unit on.
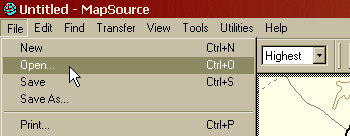
Now launch your GPS software.Use your GPS software to open the track file you downloaded.
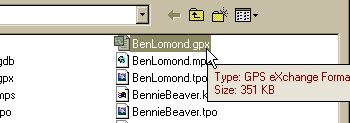
Did you remember to save the file in the GPS software's default directory?If the program won't open, use a GPS conversion utility to change the track file's XML coding
to a type that your program can recognize. These utilities can be downloaded for free.
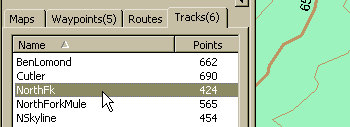
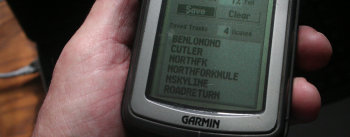
If there are several tracks in the GPS file, decide whether you want the ALL the tracks in
your unit. A single track corresponding to your planned ride is less confusing. More tracks
gives you options for add-on rides and alternate routes.
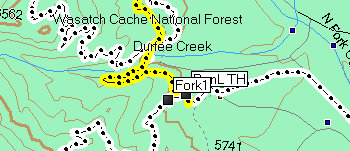
Zoom in on the critical forks and get an idea of the layout of the land. It helps to add your
own Waypoints with comments, to make navigation easier when you start riding.You can also use the GPX file in Google Earth to do a virtual fly-over of the trail.
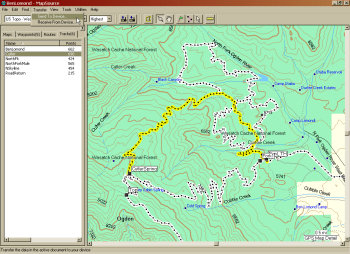
You can combine different track files to see multiple rides in the area, and to be aware of
alternate routes.Download GPS files from nearby rides and combine them. Build your store of information about
the area.If your GPS unit doesn't display maps, this pre-ride look at the terrain, roads, alternate
trails, and landmarks will help you stay on the right path.
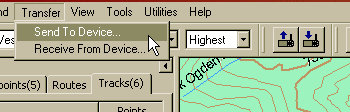
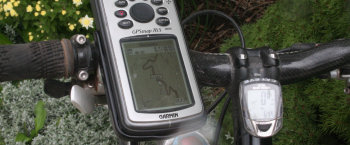
Now export your GPS information from the computer to your GPS unit. Click the icon (photo right),
or select the menu option (photo left).
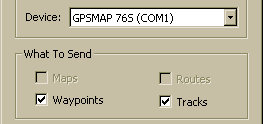
Make sure the configuration and transfer options are correct.
The tracks are now in the memory of your GPS unit. Depending on the capabilities of your unit,
you can pull up information about the track or display the track on top of an area map.
When you begin your ride, follow the saved track on your display. Most units automatically
show saved tracks in bold lines. Others require that you select the track for "backtrack" or
navigation. Some units will alert you if you've gotten off-track.No, we can't teach you how to use your own GPS unit.


