Front Shock Disassembly - Cleanout
Note: you should follow the manufacturer's instructions for servicing your brand and model of front fork. Please see the manufacturer's web site for information, or do a web search for your specific fork. The instructions below are valid only for one specific type of fork, and are intended only to illustrate the servicing process.If you ride in dust, rain, or mud, eventually your front shock will fill up with scratchy dirt. (It sneaks in through the vent holes in the boot -- the rubber accordion thingy -- and works its way between the sliding tubes of the shock.) If the crud isn't cleaned out, it will damage the shock. You might also want to take a shock apart to replace individual pieces, for example to swap elastomer to change the performance of the shock. If you only need to lube the wiper (the part that cleans the stanchion as it slides into the slider), see our page on Lubing the Wiper.
How you disassemble your shock absorbers depends on your hardware. Some are really easy. For example, the one just below on the left can be taken apart in about 60 seconds. (Just unscrew the plastic caps at the top, unscrew the bolts at the bottom, and unhook the brake cable, and it all slides apart!) Other front shocks are more complicated than brain surgery.
 | Left: Very common type of fork. The brake support arch is a
separate piece of metal, bolted onto the lower tubes. Behind the dropouts,
there's a bolt in a recessed cavity that holds the elastomer in place
at
the bottom. The top cap has two knobs -- the top one adjusts the tension
on the elastomer, the bottom one unscrews the cap so the elastomer can
slide out. Right: Brake support arch is fused to lower shock tubes. No bottom bolt, but same mechanism at top of shock. |
|
 | Left: Separate brake support arch, which must be removed to
turn (silver) knob to release lower tube from upper. (At the top, the
black cap is just to keep the dust out -- there is no adjustment or
assembly mechanism here at the top.) Fork ends in dropout. Right: Long tubes have a cross-support at the top of the steering tube. Cross-pieces clamp the top tube. Fused brake support arch. Separate tubes for rebound and dampening; one bottom has a bolt, the other has an adjusting knob. |
|
Let's go to work on a sample shock. You won't need to disassemble as much as we have here, but our purpose is to show you how everything comes apart, so you can figure out what you need to pull apart on YOUR shock.

The front fork attaches to a tube (called a steerer) that inserts into the steering tube of the bike frame. This tube may be secured with bolts, or it may be welded solid. (The black ring is a bearing cup.)
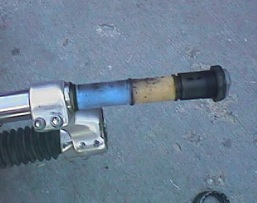
On each side, the cross-piece attaches to a stanchion tube. On most bikes, you can remove these tubes, as shown here. On others, the cross-piece and stanchion form a solid piece.
On this bike, a top cap screws into the tube. This holds the elastomer in place, with an adjusting knob on top that can increase the downward force on the elastomer.

 |
|
(Pretend we haven't done anything yet.) Our bike is the first example above, an elastomer shock without recoil dampening, with a bottom attachment bolt and a screw-in top cap on top of the elastomer. (Your shock may be different. That's why we've shown you what some of the other stuff is, and how it's removed. For example, on one of the bikes above, you need to remove the brake support arch in order to open the shock.)
 | After dropping the wheel and disconnecting the brake cable, we unscrew the bolts from the bottom of each side of the fork. |
|


Now we lube the adjustment mechanism and put the elastomer back.


Now we put the boot back onto the groove at the top of the slider, then slide the inner (stanchion) tube back into the lower half of the shock.


Now we put the bottom bolt back in both sides of the shock, and reattach the brake cable. Our shock is clean.


