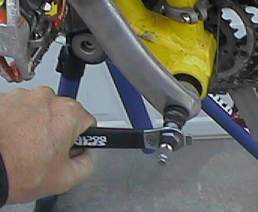
Crank Removal and Replacement
The crankarms can be damaged where they attach to the spindle of the bottom
bracket, or where the pedal threads at the distant end. In that case, you're
going to need to get the correct replacement set before you start. Or, you may
just need to remove the chainring-side crank to replace chainrings. We'll cover
3 types of crank attachment:
Female-threaded tapered spindle - the most
common type, where a bolt holds the crank on the spindle.
Male-threaded tapered spindle - where a nut
holds the crank onto the spindle.
Splined spindle - where the spindle is a ring
with teeth that fit into slots in the crank.
Damage at the spindle (where the square hole in the crankarm fits over the square dohickey sticking out of the bottom of your bike) is usually due a loose retaining bolt. The crank arm slips a bit away, making the connection loose. The spindle rotates a bit in the mounting hole and gradually deforms it. Damage at the pedal end of the crankarm occurs when crappy metal meets up with a heavy biker slamming down on the pedal.
If you're replacing a damaged crankset, you need to buy a correct a replacement crankset. Some cranksets (for example, those designed for eliptical chainwheels) bolt onto the chainring itself. Most attach directly to the spindle -- the freely-rotating thing that sticks out from the bottom bracket.
If your bike has a crank attachment other than the standard female-threaded
tapered spindle, you'll want to jump to another page that covers these alternate
crank attachments.
Male-threaded tapered spindle
- where a nut holds the crank onto the spindle.
Splined tapered spindle
- often found with hollow bottom brackets, spindle has tapered teeth, requires
crank-puller.
Other crank attachments - go to the manufacturer's web
page, or do a web search
Female-threaded tapered spindle - the most common type, where a hex-head bolt holds the crank on the spindle, which is square with rounded edges, and has a threaded hole drilled into it.

If you loosen the bolt, then the crank falls away to show a ring with teeth, you have a splined crank: click here !
DON'T remove the crank by pounding it or prying with a lever. You'll destroy the bearings in the bottom bracket!


Continue turning until the crank has come loose from the spindle.
Listen for grinding or rubbing as you turn the spindle. If the bottom bracket is bad, now's a good time to replace it .


Now use your hex wrench and crank extractor exactly as you did on the other side. The crank will come off with chainrings attached.
If you removed the crank to replace chainrings (rather than replacing a damaged crankset), go to work on that now.

Now place the new crank -- in the same position on the spindle as the old one. Apply Loctite to the threads of the retaining bolt. Tighten the bolt, and (if you have one) replace the protector cap.
You're now ready to thread the pedal into the crankarm.


